Monday, October 26, 2009

Recipe #10: Salsa

Before I delve into this recipe... I'm sorry it has taken me so long to update. I am so completely focused on winning another contest right now that it's taken up so much of my time! But no worries, it'll be over this week. If you'd like to vote for me, you can do so right here. Otherwise, read on!

I can't take credit for this entire recipe -- the basis of it came from a friend's mom who could make the best salsa and pico de gallo I have ever had. I have changed it up a little though, and hopefully she'd still be happy with it. I can't tell you how many times I enjoyed this salsa (which I think is best served warm) with tacos, burritos or even just chips. It's so flavorful, and so worth the time it takes waiting for the veggies to be ready. For me, "salsa" you can buy in a jar just isn't real. I live in San Diego for a few years, and learned to really appreciate salsa (or hot sauce, since that's what most there call it), and other than this one, I've yet to find anything on the east coast that can come close! Please note -- wherever you see a (*) next to an ingredient or tool, there is a comment about it below the recipe. Enjoy!

Salsa


Prep time: 40 minutes
Cook time: 45 minutes

Ingredients

5 Roma or Plum tomatoes
1/2 jalapeno pepper*
3 cloves garlic*
1 teaspoon onion salt
1/2 teaspoon garlic powder
handful cilantro, chopped
1/2 cup chopped onion (about half a small onion)
3 tablespoons salt

Tools
food processor
large pot

Remove cores of tomatoes. Though it won't affect the taste, removing them now saves you from removing them later and a) burning yourself, and b) ending up with a chunk of tomato core in your salsa.


Bring two quarts of water and 3 tablespoons salt to a boil, add tomatoes and jalapeno pepper. Cook until skin is falling off tomatoes, or split and visibly pulling away from the flesh.


Remove tomatoes and pepper from water, and set aside. Let cool for at least 30 minutes.


When cool enough to handle, remove skin from tomatoes. The skin should fall/peel off easily. Keep tomatoes as intact as possible, but discard skins.


Place tomatoes and juice rendered while peeling in food processor, along with garlic, onion salt and garlic powder. Puree.


Reserve tomatoes, and place jalapeno pepper in food processor, process til pureed. Add 1/4 pepper puree to tomatoes, and taste. Add more to increase heat. When desired heat is reached, add chopped onion and cilantro.

Serve warm, garnish with cilantro.


*Comments:
-Jalapeno: If you can't find fresh jalapenos, it's okay to substitute long, serrano, or Hungarian wax peppers. Just use the same method of a) pureeing the pepper separately from the tomato, and b) adding the puree little by little. It's easy to increase the spice -- it's nearly impossible to take it away.

-Garlic: I don't usually use fresh garlic when I cook, unless it's going to be almost raw in the dish. What I use instead is a huge jar of Spice World minced garlic. It saves me the time of having to chop (and have my hands smell like) garlic for any given recipe. For this recipe, if you use the jarred garlic, use two tablespoons.

-Onion/cilantro: When I make this salsa, I purposely do not add the onion or cilantro into the food processor. For one, I like pieces of onion, whole. That said, I do chop it VERY finely before adding it. As far as the cilantro goes... you can add less, if it's not a flavor you love. To me, it is authentic Mexican, but to others, it tastes like soap. Be sure NOT to chop it ahead of adding it. Aside from looking prettier, cilantro has a tendency to become somewhat gummy when you chop it finely. You're better off tearing and adding whole leaves that will flavor the salsa, but are big enough for you to avoid if you don't like the flavor engulfing your entire bite.

Enjoy!

Tuesday, October 13, 2009

Restaurant Review: Wholly Cannoli, Worcester

After hearing about them on Phantom Gourmet, my husband and I decided to try Wholly Cannoli on Grafton Street in Worcester for our giving-dessert-as-a-thank-you-gift needs this past Sunday night. Though we had to make a beeline to get there by closing (7 p.m. on Sundays), it was convenient that they were even open Sunday nights whereas we'd be out of luck with most other bakeries. Though I'd heard good things on Phantom and had high hopes since even their website says they have the largest selection of cannolis on the east coast, I really thought, how bad can a store full of Italian pastries be?

I was pleasantly surprised to see that this wasn't just a little hole (whole?) in the wall (not that I wouldn't have gleefully ordered up a plethora of desserts had it been); there are several tables where you can sit and enjoy your baked goodness, but of course, they also do quite the take-out business. The selection -- not just of cannoli, but also cookies, cakes, and individual pastries is absolutely overwhelming.

As much as I would have liked to sample something from each category, I was there on a mission: cannoli. Delicious cannoli, and nothing else... until I laid eyes on a heavenly confection known as a "Dynamite Stick." I don't even know what they are, I thought, but "Two of those, please." Three caramel swirl cannoli, one white chocolate raspberry, two pumpkin pie, two chocolate chip, one Snickers, one tiramisu and two others that I don't recall the names of, but they had tiny peanut butter and chocolate chips on the end (I'm not a peanut butter person, but figured one of our guests may be) completed my order. I was impressed that the young lady behind the counter gently placed each pastry in the oversized box, and as a result, they were all in perfect condition when we went to dig in.


They all looked great, but admittedly... I was most excited about the "Dynamite Stick." When I got home (and immediately devoured one), I discovered that not only is it NOT a candy bar, it is quite possibly the most delicious dessert I've ever eaten. The Dynamite Stick is sweetened ricotta cheese, slathered in caramel, and covered in a hard chocolate shell. There is a coating on the chocolate also -- maybe cake crumbs? -- but I couldn't tell what it was. Not that it mattered, it could have been pickled cricket heads and I would still have delighted in every bite.

I didn't try every flavor, but can personally recommend the tiramisu and caramel varieties. They are as pretty to look at as they are tasty.

My one gripe with Wholly Cannoli is only their prices. For one dozen cannoli and two dynamite sticks (which are $4 each), the total came to $48. That's not to say that the food wasn't worth it, but if you're looking for tasty on a budget, especially for a crowd, you might be better off checking out a different shop in Worcester or a neighboring town. I should note, however, that their occasion cakes, which range from 8-inch round ($12.95) to full sheet ($60) and come in a vast variety of flavors, do seem very reasonably priced.

That said, the food was delicious, and it looked like a cute place to stop for a quick meal -- they also have a few breakfast offerings and a lunch menu with sandwiches on foccacia bread, pizza, wraps and salads -- and definitely a dessert, eat-in or take-out. If you have the extra dough (get it?) to spend, and you're looking for truly tasty and unique cannoli creations, Wholly Cannoli is the way to go.


Wholly Cannoli
490 Grafton Street
Worcester, Mass., 01604
(508) 573-0224
http://www.whollycannoli.com

Hours:
Monday - 7 a.m. to 7 p.m.
Tuesday - 7 a.m. to 7 p.m.
Wednesday - 7 a.m. to 7 p.m.
Thursday - 7 a.m. to 9 p.m.
Friday - 7 a.m. to 9 p.m.
Saturday - 7 a.m. to 9 p.m.
Sunday - 7 a.m. to 7 p.m.

Sunday, October 4, 2009

My major award! I won, I won, I won!

I knew all those years of watching way too much Bravo and twittering (or tweeting?) way too often would eventually pay off. And boy, has it. Behold... my major award, courtesy of Top Chef Masters contestant (and runner up) Michael Chiarello.


I'd like to introduce you to my five new children -- chef's knife one, bread knife, paring knife, chef's knife two, and their big brother, santoku knife.

A few months ago, while on maternity leave (of course), I entered a giveaway for the knives -- which were part of the Top Chef Master's Tool Box giveaway promotion -- at Chef Chiarello's website. Imagine my surprise when the day before my birthday, I got an email from someone at NapaStyle, Michael's (yes, we're on a first name basis... he even tweeted me personally while I was bragging on Twitter about having won them. Seriously. Life = made) company that I had won the giveaway. Happy birthday to me!

They finally arrived on Friday after being on back order, and I'm so excited to use them, I'm deliberately thinking of recipes that involve lots of chopping for this week.

I'm already in love with my knives, and if you want to buy them, you can find them here (santoku knife), and here (chef's and paring knives). The others, I believe, are not sold separately, and thus I just consider my "major award" that much more special!

(Side note: Though I did not win this, and the cost of it would probably negate my freebie, check these out. I think this is the coolest invention since sliced bread -- I slay me! -- and just might ask Santa for them for Christmas!)

Recipe #9: Chocolate Beignets

While I have never myself had these outside of my own experience cooking them, my husband had. Beignets (prounced "ben-yays") are a sort of New Orleans style doughnut, minus the whole circle-with-the-middle-cut-out aspect. At the legendary Cafe Du Monde in New Orleans, they are topped with powdered sugar and served with cafe au lait. Well, I may not have gone the very traditional route -- though if you'd like to, visit the cafe's website, where you can buy their beignet mix -- and I substituted hot chocolate for the coffee, I think these beignets came out just wonderfully! Please note -- wherever you see a (*) next to an ingredient or tool, there is a comment about it below the recipe. Enjoy!

Chocolate Beignets

Prep time: 20 minutes, plus dough rising time (4 hours to overnight)
Cooking time: 30 minutes oven rising and 5 minutes frying

Ingredients
1 envelope active dry yeast
2 tablespoons butter
2 Hershey bars, 1.55 ounces each
3/4 cup luke warm water
1/4 cup sugar
1/2 cup evaporated milk
pinch of salt
1 egg
4 cups flour
1/8 cup shortening
oil to fry

Tools
deep fryer or pan for frying*
cookie sheet
mixing bowl
rolling pin
greased bowl
stand mixer
parchment paper*

Before beginning, melt one chocolate bar either in a double boiler or even in a bowl in the microwave.

Combine yeast, water and sugar in bowl of stand mixer, and allow to sit until yeast starts to bubble -- about 5-7 minutes. Beat egg and add to mixture along with salt and evaporated milk.


Mix on low, and slowly add two cups of flour. Keeping mixer on, add half the shortening, allow to combine, add remainder of shortening, melted chocolate and remainder of flour. Do not overmix or dough will become too tough.

Remove bowl from mixer and place dough in greased bowl (tip: use butter wrapper to grease). Cover with foil or plastic wrap and allow to rise in the refrigerator overnight, or for at least four hours. Dough should *about* double in size.


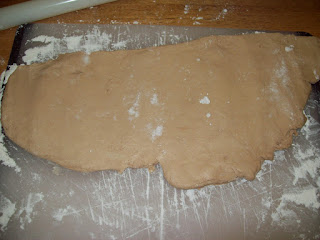
When dough has risen, place on floured surface and roll til 1/2 thickness is reached.


Cut into strips or rectangles, and place on parchment paper-covered cookie sheet, and put into 175-degree oven for 30 minutes (beignets should rise a bit, but not actually cook).

Remove from oven, and beignets should feel slightly toasted to the touch.


Fry in oil -- either in deep fryer or pan with about 3 inches of oil -- until golden brown, flipping halfway through.


After frying, place on paper towel to drain.


Melt second chocolate bar with butter. Frost beignets with chocolate, and serve warm.


*Comments:

-Deep fryer: Cook these in oil that has reached 375 degrees. It's hard to tell in a regular pan whether the oil has reached that temp, which is why I *much* prefer to use a regular fryer. I bought mine at Walmart and use it all the time. It's very easy, and if you like it, you can find it/buy it here.

-Parchment paper: Please believe me when I say this -- for all intensive purposes, including anything that involves heat, WAX PAPER AND PARCHMENT PAPER ARE TWO DIFFERENT THINGS. If you're using them outside the oven, sure, they are pretty interchangeable. But I beg of you, for the love of all that it holy and for the sake of your bakeware... be kind, only use parchment in the oven! Aside from the fact that the wax on wax paper melts in the oven and can ruin your bakeware (just ask my husband!), you will discover a new-found love for the seemingly magical parchment paper. Never lose a cake bottom to a heated pan again! :)